Rank | Picture | Name | Rating | Shop |
#1 |  | BEST OVERALL - BLACK+DECKER 40V MAX Cordless Hedge Trimmer | ||
#2 |  | RUNNER-UP - DEWALT DCHT820B Hedge Trimmer | ||
#3 |  | BEST ELECTRIC - CRAFTSMAN V20 Cordless Hedge Trimmer | ||
#4 |  | Greenworks Corded Hedge Trimmer | ||
#5 |  | BEST HANDHELD - Echo Gas 2-Stroke Cycle Hedge Trimmer |
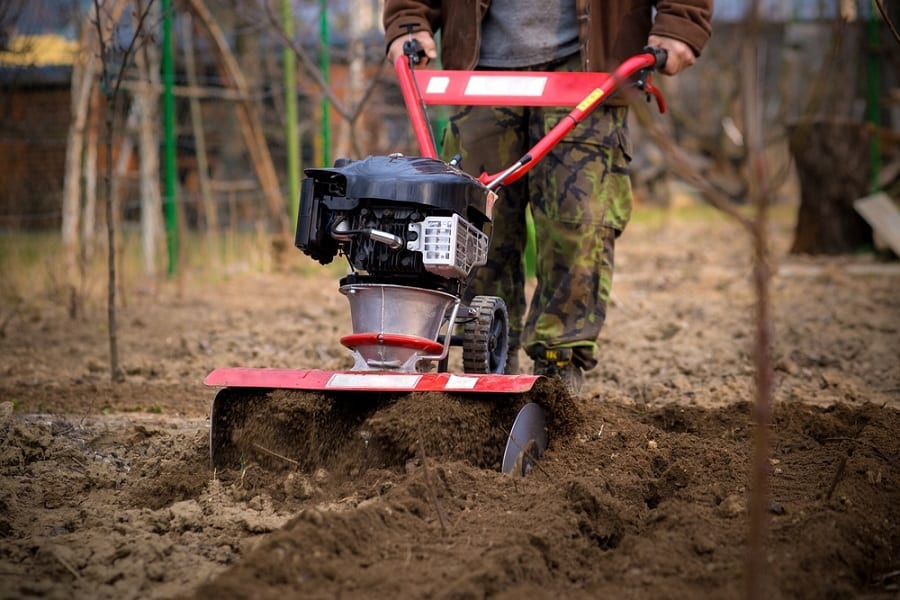
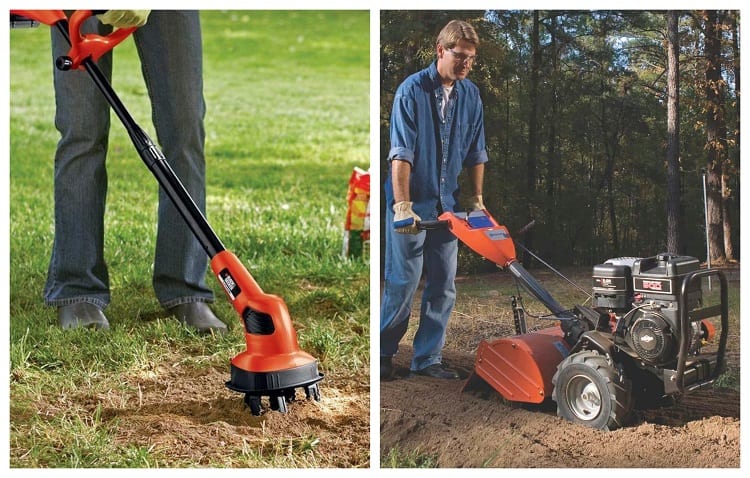
Tilling the garden is something you might be unsure about.
Do you really need to do it or is it a waste of time?
Although some people insist that tilling your garden is something you can skip in favor of doing other gardening tasks, the truth is that there are benefits to tilling your soil from time to time, such as once or twice a year.
What are the main advantages of tilling?
When the ground is hard and the soil needs to be broken down so that you can plant things in it, tilling can help to prepare rows for your veggies or flowers. After all, loose, aerated soil is what you want for your plants, and tilling by hand isn’t always easy so purchasing a tiller is a good idea. However, which tiller should you purchase?
There are lots of different tillers on the market, which can seem a bit daunting but don’t worry – here’s a list of the best tillers for all your gardening needs so you can become a pro at tilling and prepare your garden for lovely new plants.
Now that we’ve looked at some important data pertaining to the best tillers for your gardening needs, let’s see why these five tillers are so highly rated and worth purchasing.
Table of Contents
Best Garden Tillers – Reviews And Recommendations For 2021
Best Gas Tiller: Earthquake 20015 Versa Front Tine Tiller
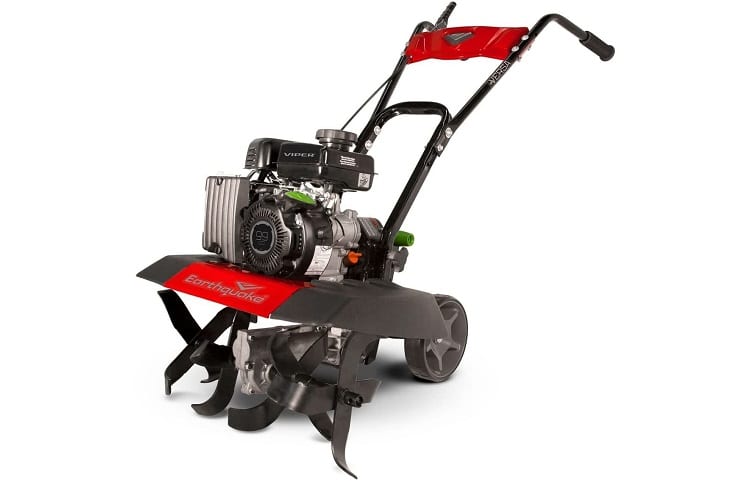
The reason why this gas tiller makes our number-one spot is because it’s a game-changer – while many gas-powered tillers are heavy and difficult to use, this one is light while also being user-friendly.
Featured specs
- Stable yet lightweight
- Can be used as a cultivator
- Five-year warranty
Benefits
- One of the biggest benefits of this tiller is that you can remove the outer tines as well as its shields in order to turn it into a cultivator. That means that it’s essentially two gardening tools in one.
- This tiller is really lightweight – it weighs 85 pounds – so you can move it around easily. It’s also compact so that it can fit into tight corners, which is perfect for asymmetrical gardens.
- Although it’s light, it’s also built to be steady. It’s got a low center of gravity to achieve greater stability.
- The gas tank of this tiller can carry up to half a gallon of fuel.
- This tiller is built to be convenient and user-friendly. For example, it has a drive lever that’s really easy to use when you want it to move or stop.
Drawbacks
- The tiller is packaged in a pre-assembled state. You will have to install the tines, side shields, handlebars, and drag stake. However, it shouldn’t take you more than a couple of hours to do this.
- Unfortunately, the product instructions are said to be disappointing, so you might have to enlist the help of YouTube videos to help you along when assembling this tiller if you’re not sure of what to do.
Extra Features
- This gas tiller comes with a five-year warranty.
- It has two height settings to increase your comfort while using it.
- You won’t have to sit there for a long time trying to get it to start. It starts quickly and easily after just one pull, so anyone can use it.
Buying Advice
This tiller costs around $400. Although it’s a bit pricey, it’s certainly got a lot of features that make purchasing it really worth it.
Runner Up: Southland SCV43 Cultivator
Gas-powered tillers are more powerful than electric ones, but they can sometimes be tough to manoeuvre. This Southland tiller changes all that by offering touches of comfort – it’s definitely beginner-friendly!
Featured specs
- Manual recoil
- Carry handles
- Narrow tines
Benefits
- This tiller has a manual recoil that makes it really easy to start.
- One of the best things about this tiller is that it’s easy to transport and store away in the garage when you won’t be using it for a while – it’s equipped with convenient carry handles.
- The tiller has rear wheels that are seven inches in diameter to make it really easy to move it around, even if you’re moving uphill or have tight corners to navigate.
- The tines are narrow, so you can easily move them between trees or other structures in your garden.
- You can use the resistance stake to hold onto the ground so that the tines can cut through hard soil. This makes it easier to use the tiller and put in less effort, thus making it great for beginners or advanced users.
Drawbacks
- Despite its recoil, some people who have purchased this tiller have reported that they often battle to start it.
- Other people who have bought this tiller have needed to have it repaired but have disappointingly found that the company battles to source some essential parts for it. This means that if you have big problems with this tiller, you might have to purchase a new one.
Extra Features
- This tiller is both EPA and CARB certified. This means that the tiller is kinder to the environment than other tillers on the market.
- You can easily adjust its tilling width from seven to 10 inches.
Buying Advice
This tiller costs around $330. Some of its best features are that it’s user-friendly and comfortable to use, while being great for the environment.
Best Electric Tiller Winner: Sun Joe TJ603E 12-Amp Electric Tiller
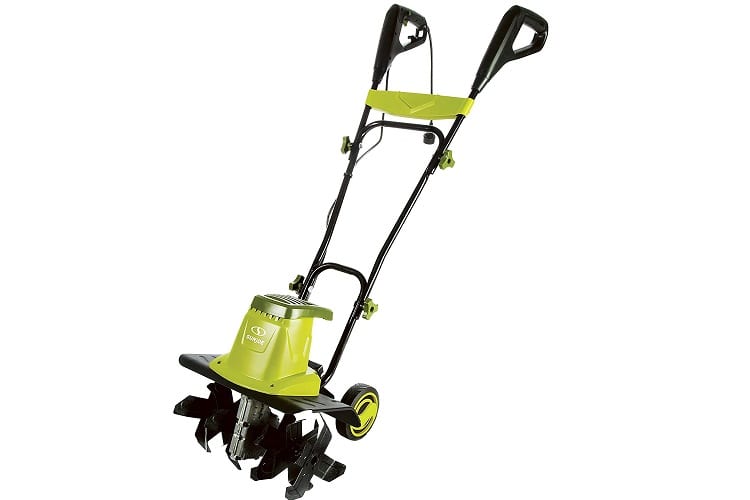
This is another tiller that you can use as a cultivator. It’s equipped with some excellent features that are sure to make your tilling work much easier. For starters, it doesn’t rely on gas so it will be really easy to start!
Featured specs
- 340 RPM
- 6 blades
- Folding handle
Benefits
- This tiller has a 12-amp motor that enables you to till up to depths of eight inches and up to 16 inches in width.
- It’s got six angled tines that are made out of steel so that they will last a long time while working effectively to break and turn the soil.
- This tiller can reach up to 340 rates per minute, slicing through the soil quickly and ensuring it’s excellently aerated.
Drawbacks
- One of the biggest problems with this tiller is that its handle isn’t adjustable. This can make using it for long periods of time quite uncomfortable.
- Some people who have purchased this tiller have reported that it has a guard on it that’s too big and sometimes blocks your view, making it difficult to see exactly where you are tilling.
Extra Features
- This tiller comes with a folding handle to make moving and storing it easy.
- Since it doesn’t rely on gas, you can easily start up this tiller with the push of a button. So nice and easy!
Buying Advice
This tiller and cultivator by Sun Joe costs around $200. It’s a bit cheaper than previous tillers we’ve featured in this buying guide, but has all the features you need to make tilling and cultivating your garden easy as pie without having to work up a sweat.
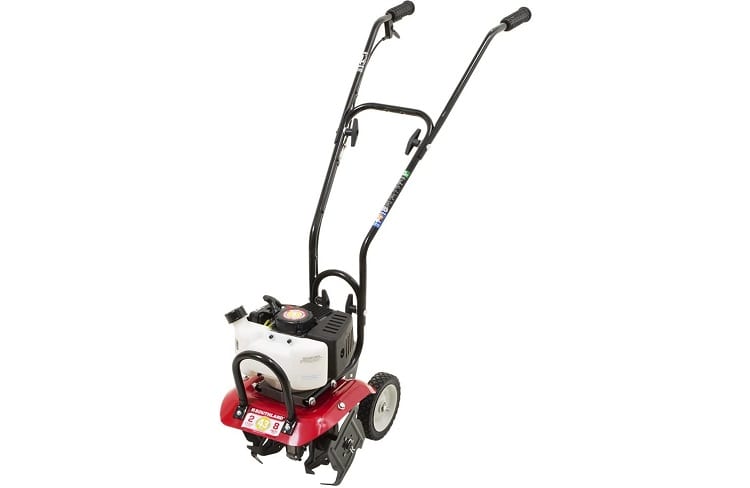
Best Electric Tiller Runner-Up: Greenworks 10-Inch 8 Amp Corded Tiller
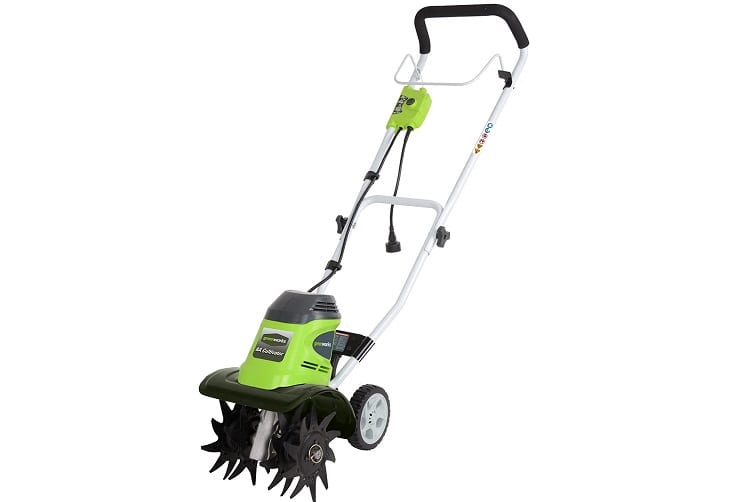
If you’ve heard of the reputable Greenworks brand, such as when it comes to their power tools, you’ll be glad to know they also manufacture tillers. Here’s why this model is one of the best garden tillers on the market.
Featured specs
- Electric start
- Four rotating tines
- Lightweight with folding handle included
Benefits
- This electric tiller has an eight-amp motor with an easy and user-friendly electric start.
- It’s equipped with four rotating tines that are eight inches to give you strength when digging into the soil.
- You can adjust the tilling width from 8.25 inches to 10 inches.
- It’s got a folding handle so that you can move it around and store it easily. It’s clear to see that folding handles are becoming the standard when it comes to tillers, and rightly so because they increase one’s convenience.
Drawbacks
- Some people who have purchased this tiller have reported that the instruction manual doesn’t give the correct assembly instructions. This has been the case when it comes to assembling the tines, with people stating that the instructions contradict the supplementary instruction sheet that was included in the pack.
- Others have reported that the tiller is a little too lightweight, which makes it lack stability at times. You might encounter this when you try to turn the tiller around after tilling one row in your garden and moving on to the next.
Extra Features
- It’s said that this tiller works well in a variety of situations, such as if you’re creating narrow and small plots to grow plants in or larger and deeper plots.
- Although some people have complained that this tiller sometimes lacks stability, it is advantageous that it’s light in weight, coming in at just 29 pounds, making it the best small tiller. This feature makes it much easier to move it around and transport it when you need to, even if you’re not physically fit.
Buying Advice
This Greenworks tiller costs around $180. If you’ve got a small to medium garden that you want to till, this is a fantastic product that won’t disappoint you.
Electric tillers have many benefits, and this Greenworks product is a perfect example of them, such as by being easy and quick to start and making your work a breeze.
Best Handheld Electric Tiller: BLACK+DECKER 20V MAX Tiller
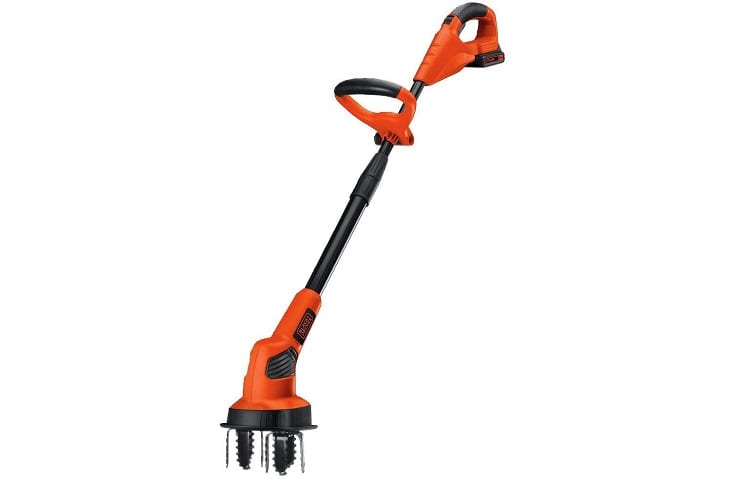
Black + Decker is a brand you’re probably familiar with for its high level of quality, and it raises the bar with its MAX tiller. What’s so great about it is that it’s a tiller and cultivator in one with many useful features, making it the best tiller for small gardens. Let’s check out its specs!
Featured specs
- Dual counter-oscillating tines
- Battery charges in eight hours
- Adjustable handle and telescoping tube
Benefits
- This best hand tiller has dual tines that break up the soil easily.
- The tines are also counter-oscillating. This means that when you till over weeds or long grasses, they won’t get tangled and wrapped around the tines. This has many benefits. For starters, it protects your tines from damage, and it also prevents you from having to stop the tiller in order to clean the tines on a regular basis.
- This tiller has a 20-volt max lithium-ion battery. This battery has a long lifespan and is said to last longer than NiCad batteries, which is a bonus.
- You can easily work through 325 square feet of land with a single charge of the battery.
- This tiller has an upright design, so it’s easier to handle than some other tillers that can be uncomfortable to use. This also prevents issues such as arm or hand fatigue when you’re tilling your garden.
- It’s got an adjustable handle as well as a telescoping tube. These both contribute to making the tiller feel much more comfortable to use, making it great for beginners and advanced gardeners alike.
- The telescoping tube can be adjusted to the right length so you don’t have to bend over when using it, which can keep body aches and pains at bay.
Drawbacks
- This tiller is currently unavailable on Amazon.
- People who have purchased this product have reported that it’s not as powerful as they would have liked. For example, if you want to remove weeds with this tiller you’ll have to do several passes over them.
- Others have claimed that the tines aren’t very durable.
- It’s worth bearing in mind that this tiller can reach depths of four inches into the soil. That’s quite a bit less when compared to other tillers we’ve featured in our reviews, which makes us think it’s more of a cultivator than a tiller.
Extra Features
- Comfort is the name of the game with this electric tiller as it has a soft-grip handle to make it easier to use for extended periods of time.
- The two tines of this tiller are long yet narrow enough so you can comfortably move them between plants and in hard-to-reach places in your garden.
- The tiller comes with an Energy Star charger that will charge your battery when it’s completely empty in just eight hours or less.
- And, it goes without saying but it’s still worth a mention: this handheld electric tiller doesn’t release any emissions, so it’s much greener to use!
- The battery is highly versatile and practical to own – you can use it in a range of other Black + Decker cordless lawn tools.
Buying Advice
As mentioned earlier, this tiller isn’t currently available on Amazon but you can purchase it from other stores, such as Walmart or Lowe’s. It costs around $100, although at some other stores it’s also out of stock.
Hopefully you’ll be able to find one because it’s a budget-friendly and useful tiller/cultivator to own that’s really one of the best garden tiller products you can find.
Tillers FAQ
Maybe you don’t really know much about tillers or why you would need to own one if you’re not a professional gardener.
Or, perhaps you’ve found a tiller on our list of reviews that has interested you but you want more information about tillers in general before you add it to your cart.
To help you better understand tillers and how to use them, let’s take a look at frequently asked questions about these machines.
What is a tiller used for?
A garden tiller is a piece of equipment that’s used to break up compact, hard soil so that it becomes loose and can therefore be used to plant things.
A tiller can be used for various tasks in the garden, such as if you need to crumble, hoe, weed, or plow your garden soil.
Because tillers break the soil into smaller pieces so that it can be used by plants, this increases the soil’s aeration and also prevents weeds from being able to grow in it.
As a gardener, you’ll love that tillers also loosen the soil that’s underneath the topsoil so that crop roots can grow successfully and grow deeper into the earth.
If you need to dig up your lawn, you can also use a tiller to help you break up the soil so that it’s easier to work with, instead of having to do this task by hand, which can be strenuous.
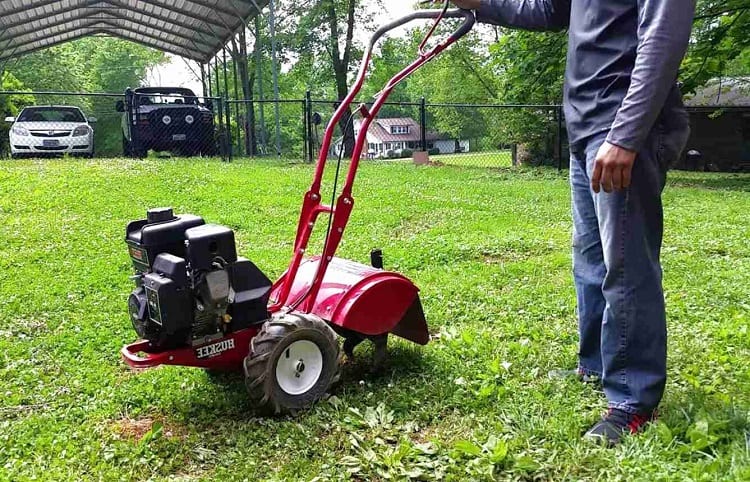
There are two types of tillers: front-tine and rear-tine tillers. Let’s look at their differences.
Front-Tine Tillers
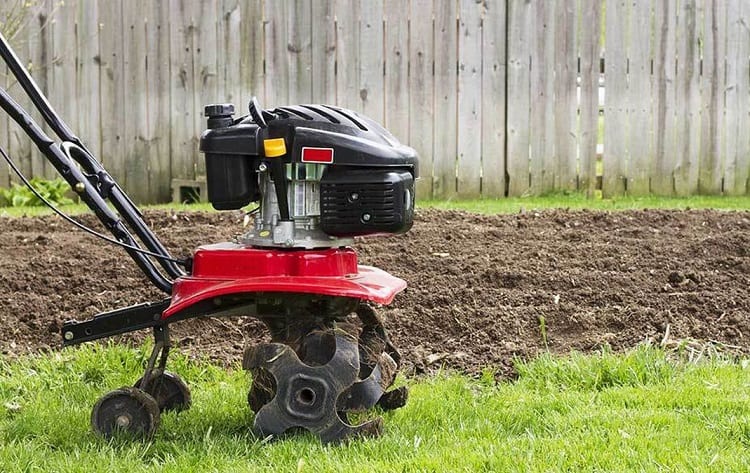
These tillers are perfect for small and medium gardens that have to be tilled.
They’re equipped with wheels behind their tines, and this is important because it makes them easier to move around to where you want them to go.
They also work well to break the hard ground so you can loosen up the soil.
If you don’t want a large piece of equipment that will just get in the way or be difficult to store in the garage or shed, you’ll love that front-tine tillers are usually smaller in size than rear-tine models.
When shopping for front-tine tillers, always make sure you look for a model with features that will make your job even easier, such as folding handles for more convenient transportation, which we’ve seen in many high-quality garden tillers in our reviews.
One of the important things to bear in mind when it comes to front-tine tillers is that you have to ensure you keep a steady grip on them to prevent them from moving forward because their tines will rotate forward and try to pull the machine along.
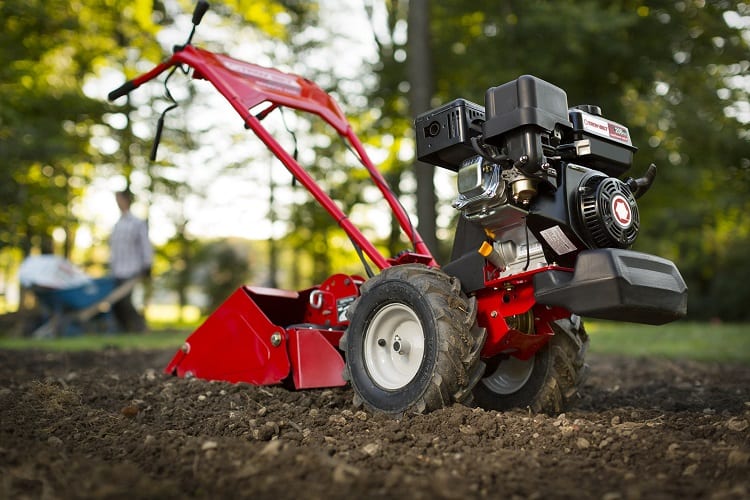
Rear-Tine Tillers
The other type of tiller is the rear-tine tiller. This one is even more powerful than the front-line tiller and it’s suitable for rocky ground as well as larger areas that need to be tilled.
The drawbacks to all those fantastic qualities is that rear-tine tillers tend to be heavier as well as more difficult to move around, so they might not be suitable for you.
Rear-tine tillers need the extra weight to give them more stability and be able to cut through hard ground, but that can be difficult to manage, especially if you’re using a tiller for the first time.
If you’re a serious gardener or professional landscaper who will need to till larger gardens, a rear-tine tiller is the best choice for you.
One of the biggest benefits of the rear-tine tiller as compared to the front-tine tiller is that it has an engine that sends power to the wheels and these work independently from the tines.
How to use a tiller?
If you’ve never used a tiller before, chances are you’re worried about how to do so.
Before we get to the steps you need to follow so that you can use a tiller in the best way to benefit your garden, we need to quickly touch on when the best time to use a tiller is.
This is important because if you use it at the wrong time or when your garden doesn’t really need to be tilled, it can backfire.
Not only will it be a waste of time but it can cause the soil in your garden to become compacted, which is what you wanted to avoid in the first place!
So, to prevent the above, it’s important to know when to till your garden. Here are two instances when tilling your soil is worth doing:
- If you’re adding compost and/or organic materials to the soil, tilling can help to work them better into the ground.
- If your soil is extremely hard and compacted, it will benefit from being broken up and loosened.
It’s also important to bear in mind that your soil should be dry enough
and warm enough before tilling otherwise the soil won’t be ready, so ideally you should till your garden during the spring. You can learn more about this by reading the article “Tilling Your Garden – When, How, And Why.”
Now that you know more about when to till your garden, let’s look at how you should go about it.
If you’re tilling your garden with a tiller, it’s much easier to do than if you had to manually till your garden. You just need to follow these steps:
- Before you use your tiller, you need to ensure that you’ve cleared away the area that you want to till so that it’s free of any vegetation. So, remove sod, weeds, as well as plants. This will ensure that you can prepare that area of the garden for new plant growth.
- You should also check the area for any rocks that will get in the way of the tilling machine. Remove them.
- Then, mark the area where you want to till your soil, such as with the use of sticks in the ground.
- Now you’re ready to use your tiller! You want to set the right depth for tilling. To do this, you’ll use the tiller’s depth adjustor. You will have to do a few passes over the ground with your tiller, so make sure your first one doesn’t go too deeply into the soil.
- When your tiller’s engine has started, you will need to engage its blades or tines. To do this, you’ll have to press the levers that are located underneath the tiller’s handles. If you’re using a front-tine tiller, you need to prevent the machine from wanting to move forward after you’ve engaged the tines, so pull the handles back to ensure the tiller remains in place.
- Now, when you’re ready to move forward with the tiller, lift the handles so that the tines will move down into the ground.
- Move forward, ensuring that you don’t speed up too much. Keep a normal pace as the tines break up the soil. A good tip is to walk with the tiller in the same way that you’d walk with, and guide, a lawnmower. If the tiller is electric, make sure you avoid passing it over its electric cord.
- Always move in a straight line, then when you get to the end of the area you want to till, turn around. It might help you to have ground markings so that you till one row in the garden at a time in a neat fashion.
- To ensure that you’ve tilled the area well, you need to do a few passes over the area with your tiller but in different directions. After doing the first pass in a horizontal direction, do the second pass in a vertical direction, or vice versa.
- When you do your second pass with the tiller, make sure the tines go deeper into the soil.
- When you have done several passes and you feel satisfied with your work, you can release the tiller’s levers. This will bring the tines to a stop. Then, simply switch off the tiller by flicking the switch located on its engine.
Electric vs Gas Tillers what’s better?
If you want to purchase a tiller, one of the questions you’ll have to ask yourself is if you should purchase an electric or gas tiller.
What are their differences, and which one is considered to be better?
Electric tillers are popular choices because they tend to be lighter in weight as compared to gas-powered tillers.
They also need less maintenance, which is great if you’re a gardening enthusiast but not a professional.
You can find cordless battery electric tillers or ones that need to be plugged into a power source.
If you don’t like having to use extension cords, you’ll probably like the idea of using a battery-powered electric tiller.
Generally, electric tillers are a smart choice because they’re affordable, but one of their biggest drawbacks is that they tend to be a bit less powerful than gas-powered tillers.
This might not be a big deal, such as if you have a small garden, however, because you won’t need a lot of power from your tiller.
When it comes to gas tillers, they tend to cost a bit more but they have more power than electric tillers.
They also give you greater freedom of movement because you don’t have to worry about their battery running out or tilling over their cords.
When choosing a gas tiller to buy, you’ll have to decide between products that have two-cycle and four-cycle motors.
Four-cycle motors tend to be more expensive as well as heavier, but they are cleaner for the environment.
In addition to that benefit, they also function at a lower noise level, so you’ll feel more comfortable about using them without upsetting your neighbors.
It’s clear to see that both electric and gas tillers have advantages, so it’s really about choosing the one that suits your needs the most so that using it will be convenient and comfortable.
Can you remove grass and weed with a tiller?
When you want to clear an area in the garden to plant new vegetables or flowers, you might wonder if you can simply use your tiller in order to prepare it.
Can you use your tiller to remove grass?
Yes, although you have to be careful with weeds. Here’s what you need to know.
- Before you start, make sure you clear the area so that it doesn’t contain any obstacles that could get in the way of the tiller, such as rocks, stones, and sticks. If you see large roots in the ground, remove those too.
- Make sure you cut away long grasses and weeds, such as with a lawnmower. This is because such materials can become wrapped around the tines of your tiller, damaging them or causing them to have to be cleaned during the tilling process.
- The next step you have to do is wet the ground if it’s extremely dry. But, don’t make the ground muddy as this will make it difficult to use the tiller machine on it. After you’ve watered the ground a bit, wait for about half an hour for the soil to dry. You can also check how wet the soil is with your hand – it should be a bit moist but never soggy.
- When you feel the ground is ready, you can start your tiller and engage the tines so that they can break into the soil.
- When using the tiller, move consistently but slowly in a straight line, allowing the blades to move and break up the soil as well as remove grass. It’s a good idea to work in rows as that will be easier to know what area you’ve done and what still needs to be done.
- Go back over the rows once you’ve done a pass with the tiller. It’s very important to till the ground in an even way so that you don’t end up with some parts that have been tilled and others that have not.
- Check your progress so you can go back over any areas where there is still grass present.
- When you are done, you should use a rake over the entire area so that you can eliminate any leftover debris or weeds. This also smooths the soil and prepares it for planting.
Can you rent a tiller or is it better to own one?
If you want to use a tiller but you don’t think you’ll need it often, you might wonder if it’s worth purchasing one if it’s just going to sit in your garage or shed for most of the time.
If you’re the type of person who might want to try your hand at manual tilling, such as if you’ve got a small garden, this might further make you consider renting a tiller instead of buying your own one.
If you’re only using a tiller twice in a year, your cost of renting one would almost be the same as buying your own, however, as Tillers Direct reports.
That’s something to bear in mind. Why not then just own your own tiller instead?
If, however, you’d prefer renting a tiller, it’s important to know that it’s best to rent one out for at least a day or more.
Even though there are four-hour and half-day tiller rentals available, these are best avoided.
They put lots of pressure on you to complete the tilling job, which isn’t a pleasant situation to be in.
There are some drawbacks to consider when it comes to renting tillers. These include the following:
- You’ll have to organize transport to fetch the tiller. A tiller probably won’t fit into your car, so you’ll have to rent a truck to transport it if you don’t own one. This will increase the expense of renting a tiller, plus it will require you to have to pay for gas to transport the tiller to and from the rental place.
- You’ll be limited when it comes to the type of tiller you can rent. You might be in a position where you’ll have to rent whatever type of tiller is currently available on the day that you need it. This could mean that you don’t get a tiller that has the features you want.
- You won’t get a new tiller. The tiller you rent will obviously have already been used by many people, so you’re not guaranteed of getting a tiller that will work well and be worth your time and money.
- You might not get a refund. If you pay money to rent a tiller and you bring it home only for the weather to turn, such as if there’s a storm that strikes, you won’t be able to use the tiller and you won’t get a refund either. That means you’ll then have to pay more money to rent the tiller out again, which is a waste of your time and money.
After considering the above, it’s also worth bearing in mind that there are advantages that are associated with purchasing your own tiller. Here are some you should consider:
- By owning your own tiller, you can use it whenever you need or like, without first having to arrange to rent one.
- Owning a tiller can work out to be cheaper, especially since you will use it sparingly, as it will last you a long time.
- You don’t have to worry about how the tiller’s been treated by other users in the past as you would when renting a tiller. In this way, you’re assured of the tiller’s performance.
- You can take your time to find the right tiller for your needs while also ensuring it has all the features you want. This will ensure that you can till your garden in the best way.
Conclusion
Owning a tiller can be a valuable investment.
It enables you to loosen the soil before you plant new things in your garden, helping it to be better aerated so that your flowers and veggies can grow in healthy ways.
However, if you’re looking for a tiller to buy, you might not know exactly which one is worth your money.
In this article, we’ve looked at some of the best tillers for your gardening needs, featuring their advantages, drawbacks, and special features to help you find the one that’s most suitable to your garden.